Understanding SageMaker Project Template Internals
Disclaimer: This content reflects my personal opinions, not those of any organizations I am or have been affiliated with. Code samples are provided for illustration purposes only, use with caution and test thoroughly before deployment.
Authors: Brajendra Singh, Shing Lyu
The blog post is derived from a workshop I built with Brajendra Singh, which was never published. I’m extracting the content to make a blog post. You will learn how to deploy the SageMaker provided MLOps template for model deployment and how the template works internally. If the screenshot is too small, right-click on the image and select Open Image in New Tab
MLOps is the one of the hottest topic in the field right now. Organizations are looking for ways to productionize their ML models, and MLOps is the key to repeatable results. Amazon SageMaker Projects is a feature that allows you to create a full MLOps pipeline in just a few clicks. You are going to create the MLOps pipeline using the SageMaker-provided MLOps template. This template creates the deployment pipeline, and creates a trigger to monitor if new models are approved in the SageMaker model registry, and use that as a signal to deploy it.
Why do you need a MLOps pipeline?
The MLOps pipeline you are going to deploy will help you build a robust foundation for your machine learning experiments. It automates the model deployment and testing processing so there is less room for human error. Once the model is approved in the model registry the model is deployed automatically to the staging endpoint, and an automated test is run against the staging endpoint. This help you catch problems with the model early and prevents you from deploying faulty model to production. You remain in control on what should be deployed to production, thanks to the manual approval step in the pipeline. All the pipeline configuration, CloudFormation templates and test script are managed as code in a CodeCommit repository, so you have repeatable deployment of the pipeline itself. By managing the pipeline as code, you also have better visibility on when and how the pipeline has changed. You can easily rollback any bad configuration. All these benefits gives your data scientists more confidence in experimenting fast and fail fast, because they know that they can easily rollback any failed experiments.
Create a Project from template
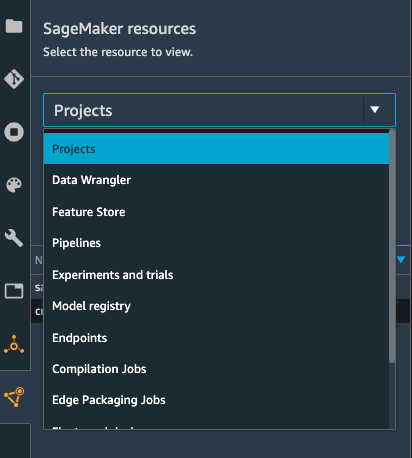
First, go to the SageMaker Studio Classic and click on the SageMaker resources icon on the left panel:
![]()
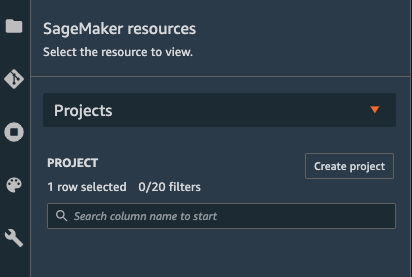
In the SageMaker resources side-panel, select Projects from the dropdown:
Then click the Create project button.
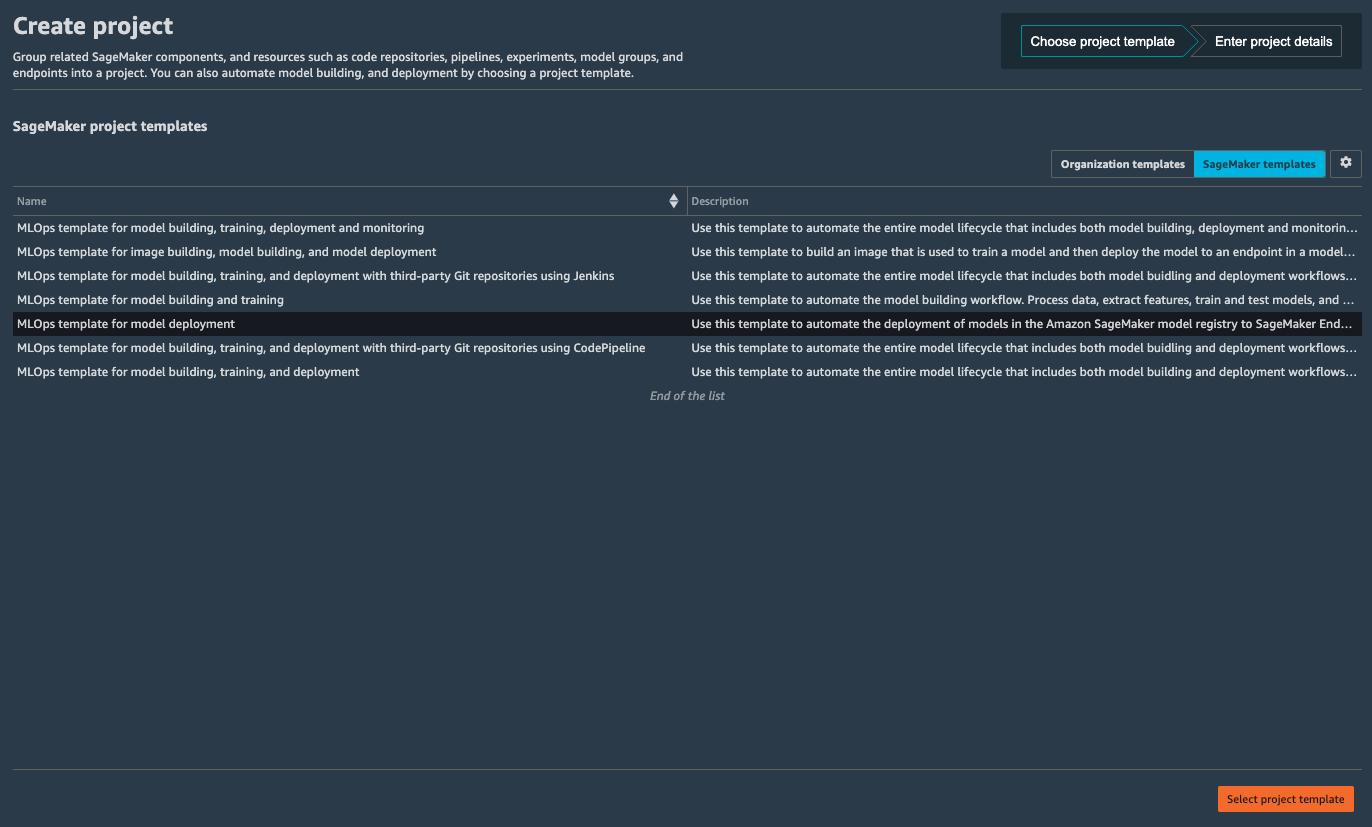
In the Create project panel, select the MLOps template for model deployment template and click Select project template at the bottom-right.
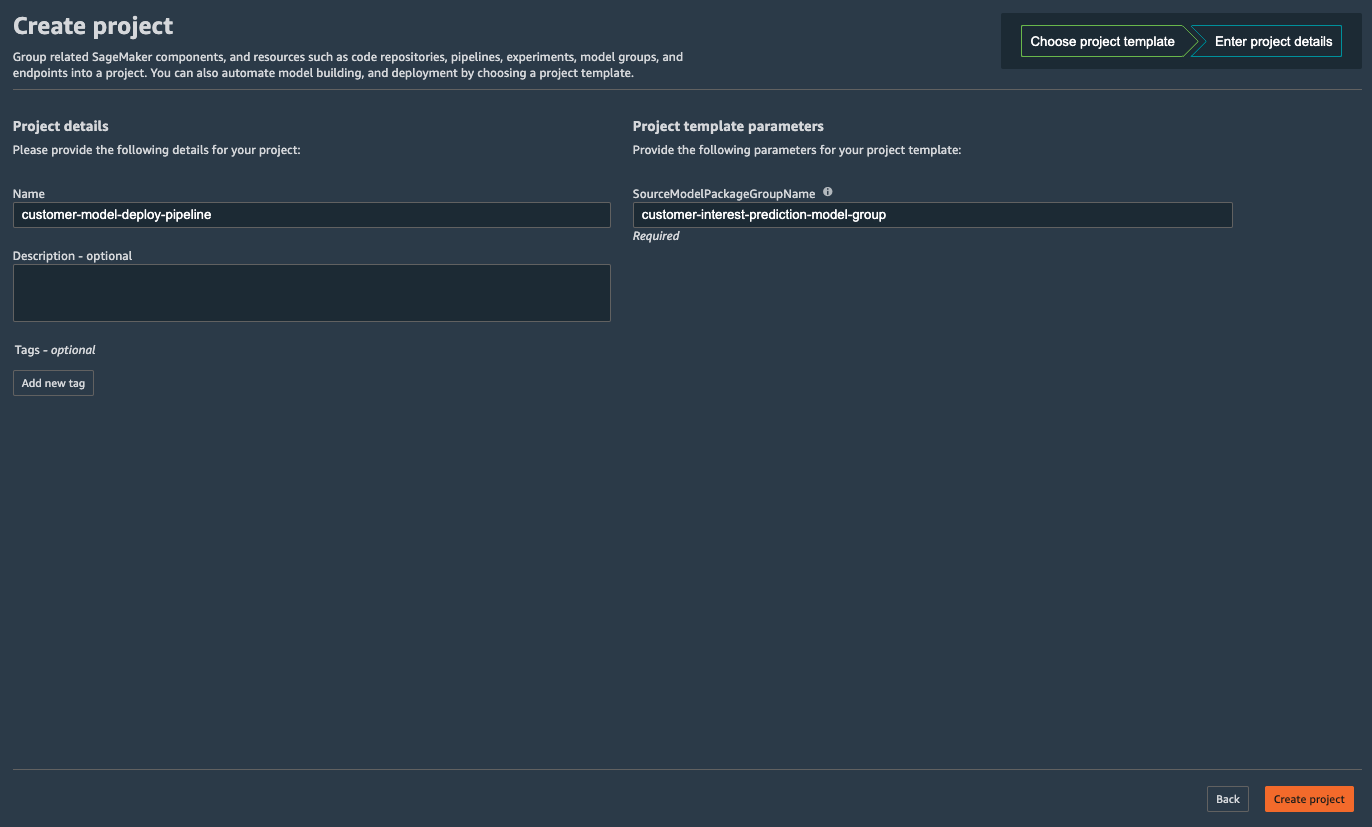
Now SageMaker asks you for some details of the project. In the Name field put customer-model-deploy-pipeline. In the SourceModelPackageGroupName, put the model group name you created in Lab 1: customer-interest-prediction-model-group. Then click Create project.
It should take several minutes to create the project, you should see a progress indicator like this:

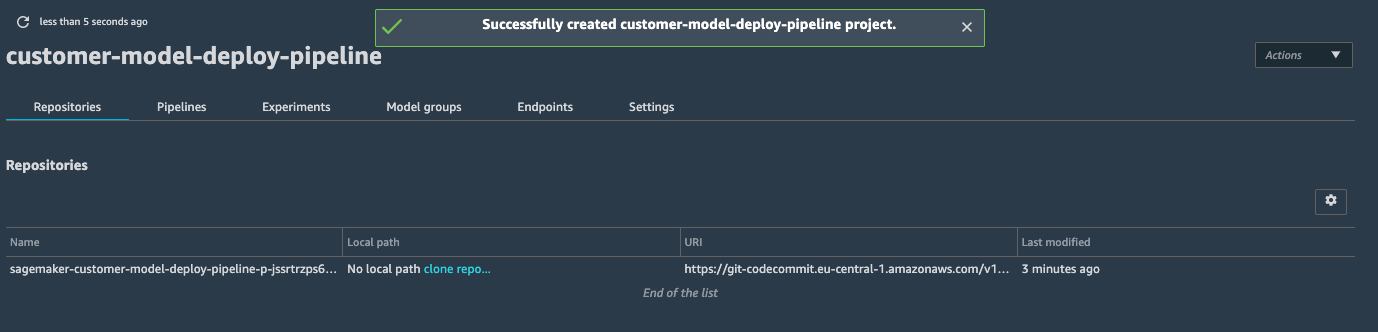
Once the project is created, you are redirected to the project page:
Understanding what the template contains
What does this MLOps template for model deployment actually do? Let’s take a look at what was deployed by this template. A MLOps Project template is a Service Catalog product that is provided by SageMaker. When you click on the Create project in the previous step, SageMaker launches this product from Service Catalog, and it creates a few resources for you.

- A CodeCommit repository that contains the definition of the pipeline steps and configuration files.
- Two EventBridge rules:
- One triggers the CodePipeline build when a new model is added to the Model Registry.
- One triggers the CodePipeline build when a new commit is pushed to the CodeCommit Repository.
- A CodePipeline that reads the configuration from the CodeCommit repository and deploys the latest model to a Staging and a Prod SageMaker Endpoint.
- And the steps within the CodePipeline that is powered by CodeBuild.
- An S3 bucket that holds the build artifact (e.g. generated configuration file and CloudFormation template).
Here is what the pipeline does:

- When a new model is approved in the Model Registry, an EventBridge rule detects that and kicks off an CodePipeline pipeline.
- The first step in the CodePipeline is the build step. It is powered by a Python script,
build.py, which retrieves the latest approved model from the Model Registry, and also the staging and prod configuration files from the CodeCommit repository. The Python script then uses this information to generate CloudFormation templates for the staging and prod endpoints and store them into a S3 bucket. - The next step deploys the CloudFormation template for staging generated by the previous step. The CloudFormation template will create the SageMaker endpoint and all the resources it depends on.
- Once the staging endpoint is deployed, the CodePipeline triggers a test step, it runs a test script included in the MLOps template to test the staging endpoint. The default test script does not perform any real testing, you can add some code to invoke the staging endpoint.
- The CodePipeline pauses and waits for a human approval.
- Once a user approves, the CodePipeline deploys the prod CloudFormation template generated by the build step.
A similar flow is triggered when you modify the code in the CodeCommit repository. This happens when you adjust the pipeline configuration files in the CodeCommit repository.
You can take a closer look at the code in the CodeCommit repository. In the project detail page, click the blue link clone repo in the Local path column:
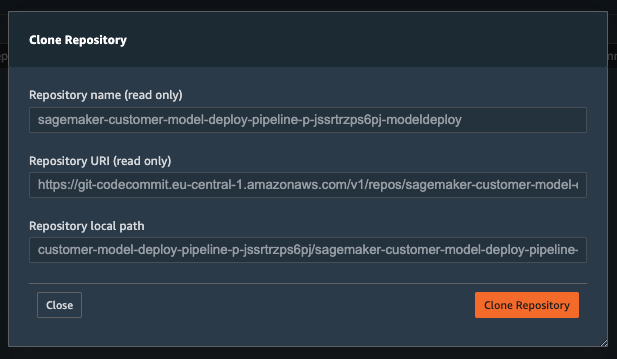
A popup will show up, click Clone Repository:
This will clone the code in the CodeCommit repository to your SageMaker Studio. The side panel should show the files you just cloned:
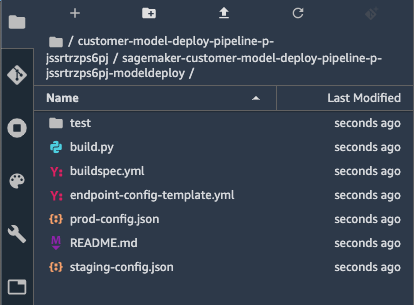
You can find a detailed explanation of the template and the files in the README.md file. We’ll highlight the purpose of a few files:
buildspec.yml: the definition of the build step. It runs on CodeBuild and uses thebuild.pyto create the CloudFormation templates for staging and prod.build.py: A Python script that gathers information from a few places to generate the CloudFormation template and CloudFormation parameter configurations. The data sources it uses includes:- The Model Registry: it uses AWS Python SDK to retrieve the latest approved model version.
staging-config.json: contains the configuration for the staging endpoint, e.g. type of instance and instance count.prod-config.json: configuration for the prod endpoint.endpoint-config-template.yml: The CloudFormation template that creates the endpoint. It needs parameters from the above sources.
test/buildspec.yml: the definition of the test step. It runs thetest.pyscript, which contains a minimal example for invoking the staging endpoint. You need to modify thetest.pyfile to invoke the staging endpoint with the test data.
The diagram below shows the data flow of these files:

Now you have deployed the MLOps pipeline, you can deploy the model using it.
Approve and Deploy Model
You can train a model in a SageMaker Sutdio notebook (or just Python scripts) and registered it in the model registry. This post focus on the deployment aspect of MLOps, so we won’t go into detail on how to train and register the model. You can reference this notebook.
You approve the registered model in the model registry to deploy the model as SageMaker Endpoint. When you approve the model in the registry, it triggers the deployment pipeline which creates the staging SageMaker Endpoint for the model. It is the model deployment for the staging and used for the pre-production testing purpose. Once you are satisfied with the testing at the staging, you can approve production deployment step in the deployment pipeline to create the production SageMaker Endpoint for the model.
Staging Deployment
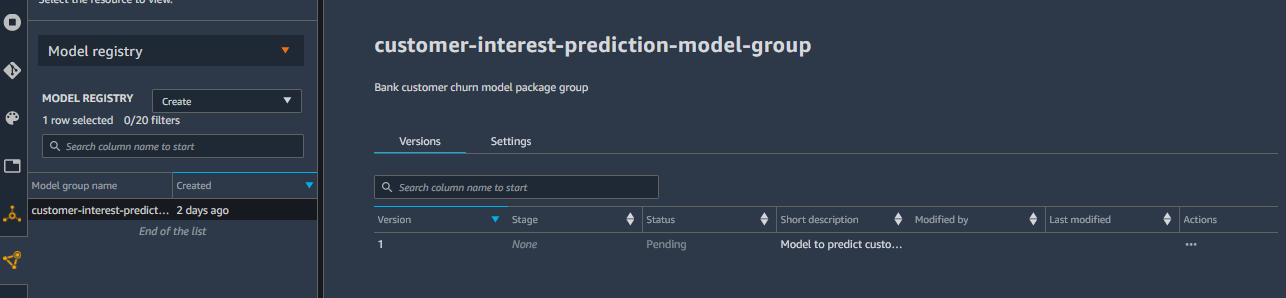
Open customer-interest-prediction-model-group model group in the model registry in SageMaker Studio. You can see version 1 for the trained model registered.
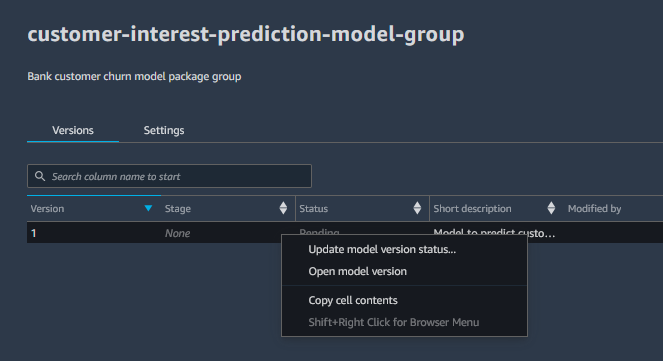
Select version 1 of the model and right click to open the menu options. In the menu options, select Update model version status… option.
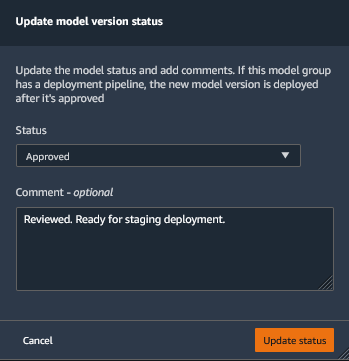
In the popup menu, select Approved for the status and provide suitable comment. Click on the Update status button to approve model deployment for the staging.
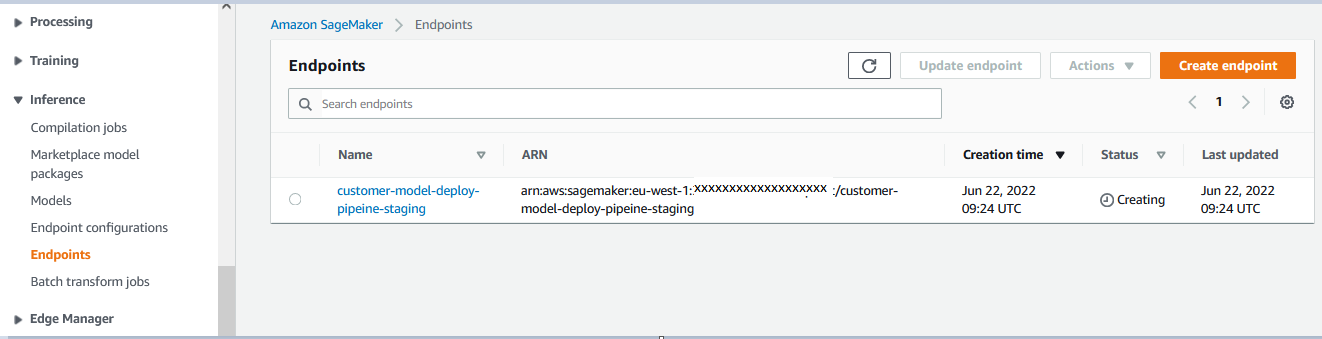
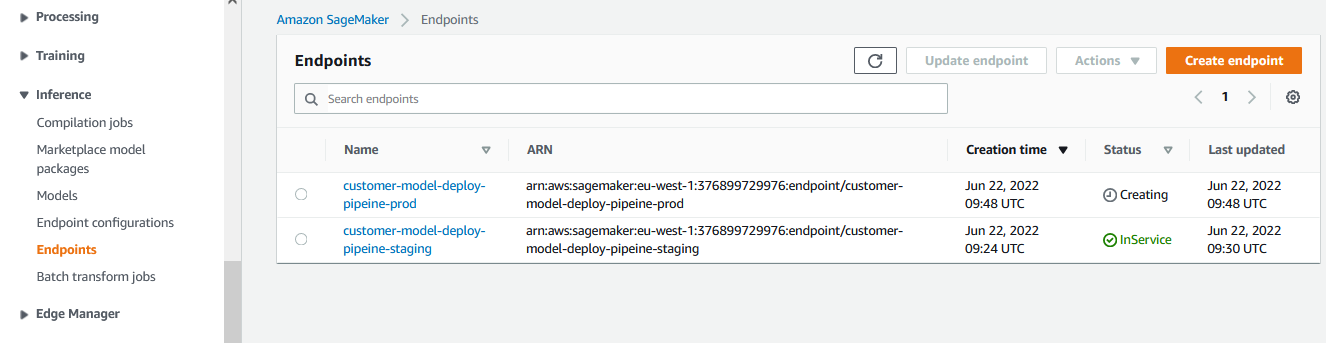
It will trigger the deployment pipeline which will create staging SageMaker Endpoint for the model. You can go to Amazon SageMaker console to see endpoint creation in progress. Sometimes, the endpoint creation might take a couple of mins to display.
The staging endpoint would be ready for testing once the endpoint status changes to InService. Please follow Lab4. Automated Testing to learn how to do automated testing of the staging endpoint.
The staging deployment is complete. If you want to deploy the model for the production, you can approve production deployment in the deployment pipeline.
Production Deployment
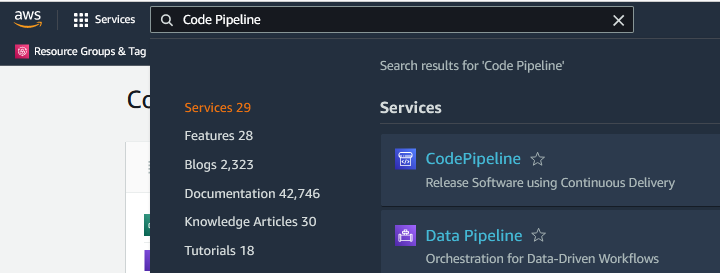
You search for Code Pipeline in the AWS Management Console to open CodePipeline Console.
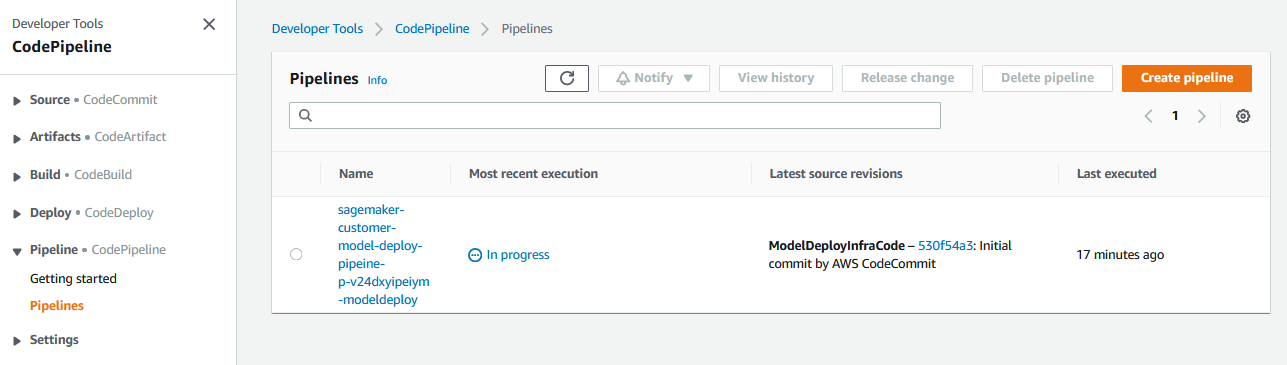
In the CodePipeline console, you can the see the deployment pipeline (starting with name sagemaker-customer-model-deploy-pipeine-) in progress. Click on the pipeline to see the details.
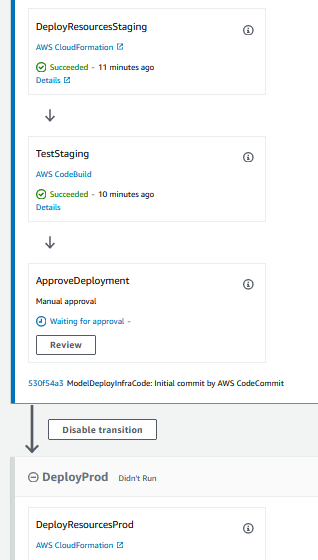
In the pipeline execution flow, you can see that the staging deployment step is complete and the pipeline is waiting for the Manual approval before the production deployment. Click on the Review button in the ApproveDeployment step.
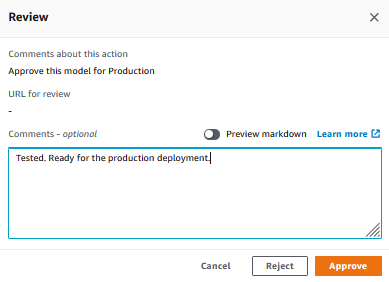
It will open a popup. Provide a suitable comment and click on the Approve button to approve model deployment for the production.
It will continue the remaining steps of the pipeline which will deploy the model for the production. You can go to Amazon SageMaker console to see production endpoint creation in progress. Sometimes, the endpoint creation might take a couple of minutes to display.
The production endpoint is ready to use when the endpoint status changes to InService.
Congratulations!!! With model deployment in staging and production, this step is complete.
Automated testing
In this step, you are going to implement an automated test for the model you trained in this notebook. After the staging endpoint is deployed by the pipeline, the automated test will invoke the staging endpoint to make sure the endpoint is functional. This can help you identify problems with the model or the endpoint configuration before you deploy the model to production.
Adding the test script
The MLOps pipeline you just deployed has a test step. But the test/test.py from the template only contains some scaffolding, and it is not actually testing anything. First let’s take a look at what the template provides you. Navigate to the file panel to the left and open the test/test.py file:
import argparse
import json
import logging
import os

import boto3
from botocore.exceptions import ClientError

logger = logging.getLogger(__name__)
sm_client = boto3.client("sagemaker")


def invoke_endpoint(endpoint_name):
    """
    Add custom logic here to invoke the endpoint and validate response
    """
    return {"endpoint_name": endpoint_name, "success": True}


def test_endpoint(endpoint_name):
    """
    Describe the endpoint and ensure InSerivce, then invoke endpoint.  Raises exception on error.
    """
    error_message = None
    try:
        # Ensure endpoint is in service
        response = sm_client.describe_endpoint(EndpointName=endpoint_name)
        status = response["EndpointStatus"]
        if status != "InService":
            error_message = f"SageMaker endpoint: {endpoint_name} status: {status} not InService"
            logger.error(error_message)
            raise Exception(error_message)

        # Output if endpoint has data capture enabled
        endpoint_config_name = response["EndpointConfigName"]
        response = sm_client.describe_endpoint_config(EndpointConfigName=endpoint_config_name)
        if "DataCaptureConfig" in response and response["DataCaptureConfig"]["EnableCapture"]:
            logger.info(f"data capture enabled for endpoint config {endpoint_config_name}")

        # Call endpoint to handle
        return invoke_endpoint(endpoint_name)
    except ClientError as e:
        error_message = e.response["Error"]["Message"]
        logger.error(error_message)
        raise Exception(error_message)


if __name__ == "__main__":
    parser = argparse.ArgumentParser()
    parser.add_argument("--log-level", type=str, default=os.environ.get("LOGLEVEL", "INFO").upper())
    parser.add_argument("--import-build-config", type=str, required=True)
    parser.add_argument("--export-test-results", type=str, required=True)
    args, _ = parser.parse_known_args()

    # Configure logging to output the line number and message
    log_format = "%(levelname)s: [%(filename)s:%(lineno)s] %(message)s"
    logging.basicConfig(format=log_format, level=args.log_level)

    # Load the build config
    with open(args.import_build_config, "r") as f:
        config = json.load(f)

    # Get the endpoint name from sagemaker project name
    endpoint_name = "{}-{}".format(
        config["Parameters"]["SageMakerProjectName"], config["Parameters"]["StageName"]
    )
    results = test_endpoint(endpoint_name)

    # Print results and write to file
    logger.debug(json.dumps(results, indent=4))
    with open(args.export_test_results, "w") as f:
        json.dump(results, f, indent=4)
The entry point of the script is in:
if __name__ == "__main__":
    # ....
It uses ArgumentParser to parse the command line arguments passed to it. If you open the test/buildspec.yaml file, you can see that it’s invoked like this:
phases:
  install:
    # ...
  build:
    commands:
      # Call the test python code
      - python test/test.py --import-build-config $CODEBUILD_SRC_DIR_BuildArtifact/staging-config-export.json --export-test-results $EXPORT_TEST_RESULTS
      # ...
Once the arguments are parsed, it setup logging and load the staging endpoint configuration file. It retrieves the endpoint name from the configuration file and calls the test_endpoint() function.
In the test_endpoint() function, the script uses the AWS Python SDK boto3 to check if the endpoint is in the InService state:
response = sm_client.describe_endpoint(EndpointName=endpoint_name)
status = response["EndpointStatus"]
if status != "InService":
    # Fail with an error
If the endpoint is InService, then it calls the invoke_endpoint() function:
def invoke_endpoint(endpoint_name):
    """
    Add custom logic here to invoke the endpoint and validate response
    """
    return {"endpoint_name": endpoint_name, "success": True}
As you can see, the invoke_endpoint() is a dummy function for you to fill in. To invoke the inference endpoint, copy and paste the code below into the invoke_endpoint() function:
def invoke_endpoint(endpoint_name):
    """
    Add custom logic here to invoke the endpoint and validate reponse
    """

    xgb_predictor = sagemaker.predictor.Predictor(
        endpoint_name,
        sagemaker_session= sagemaker.Session(),
        serializer=sagemaker.serializers.CSVSerializer()
    )
    test_x = np.array([
        [  3, 999,   0,   1,   0,   0,   0,   0,   0,   0,   0,   1,   0,
          0,   0,   0,   0,   1,   0,   0,   0,   0,   0,   0,   0,   0,
          0,   1,   0,   1,   0,   0,   1,   0,   0,   1,   0,   0,   1,
          0,   0,   0,   0,   1,   0,   0,   0,   0,   0,   0,   0,   1,
          0,   0,   0,   0,   1,   0],
       [  1, 999,   0,   1,   0,   0,   0,   0,   0,   0,   0,   0,   1,
          0,   0,   0,   0,   0,   1,   0,   0,   0,   0,   1,   0,   0,
          0,   0,   0,   1,   0,   0,   1,   0,   0,   1,   0,   0,   1,
          0,   0,   0,   0,   1,   0,   0,   0,   0,   0,   0,   0,   0,
          0,   1,   0,   0,   1,   0],
       [  1, 999,   0,   1,   0,   0,   0,   0,   0,   1,   0,   0,   0,
          0,   0,   0,   0,   0,   1,   0,   0,   0,   0,   0,   0,   0,
          0,   1,   0,   1,   0,   0,   0,   0,   1,   1,   0,   0,   1,
          0,   0,   0,   0,   0,   0,   0,   0,   1,   0,   0,   0,   1,
          0,   0,   0,   0,   1,   0],
       [  3, 999,   1,   1,   0,   1,   0,   0,   0,   0,   0,   0,   0,
          0,   0,   0,   0,   0,   0,   1,   0,   0,   0,   0,   0,   0,
          0,   1,   0,   1,   0,   0,   1,   0,   0,   1,   0,   0,   1,
          0,   0,   0,   0,   0,   0,   0,   1,   0,   0,   0,   1,   0,
          0,   0,   0,   1,   0,   0],
       [  1, 999,   0,   1,   0,   1,   0,   0,   0,   0,   0,   0,   0,
          0,   0,   0,   0,   0,   0,   1,   0,   0,   0,   0,   0,   0,
          0,   1,   0,   1,   0,   0,   1,   0,   0,   0,   0,   1,   0,
          1,   0,   0,   0,   1,   0,   0,   0,   0,   0,   0,   0,   0,
          0,   1,   0,   0,   1,   0]
    ])

    predictions_string = xgb_predictor.predict(test_x).decode('utf-8')
    predictions = np.fromstring(predictions_string, sep=',')
    assert(len(predictions) == len(test_x))
    for prediction in predictions:
        assert(isinstance(prediction, np.float64))
        assert(prediction >= 0 and prediction <= 1)
    return {"endpoint_name": endpoint_name, "success": True, "predictions": predictions.tolist()}
In this code snippet, you create an sagemaker.predictor.Predictor with the endpoint’s name. Because the input is in CSV format you also specify that the serializer is sagemaker.serializers.CSVSerializer. There are 5 test cases hard-coded in a numpy array, named test_x. You then call xgb_predictor.predict(test_x) to invoke the staging endpoint with the 5 test cases. This should return 5 predictions. But the SageMaker endpoint result is serialized as a UTF-8 string, so there are some extra code that decodes it and parse it back in to a numeric array. Finally, the test does some sanity check to see if the predictions are valid floating point number and is within the range [0, 1].
The code uses the sagemaker SDK and numpy, so remember to import them at the beginning of the file:
# ...
import boto3
from botocore.exceptions import ClientError
import sagemaker   # << add this
import numpy as np # << add this
This script is executed in a CodeBuild environment. By default it doesn’t contain the sagemaker and numpy packages. So you need to install them before the test script runs. Open the test/buildspec.yml file and add the following command to the phases.install phase:
version: 0.2

phases:
  install:
    runtime-versions:
      python: 3.8
    commands:
      - pip install sagemaker numpy # << add this line
  build:
    commands:
      # Call the test python code
      - python test/test.py --import-build-config $CODEBUILD_SRC_DIR_BuildArtifact/staging-config-export.json --export-test-results $EXPORT_TEST_RESULTS
      # Show the test results file
      - cat $EXPORT_TEST_RESULTS

artifacts:
  files:
    - $EXPORT_TEST_RESULTS
Commit the changes and push to CodeCommit
To trigger the pipeline, you need to commit and push the modified code to CodeCommit. The SageMaker Studio has an integrated Git user interface for that. Click on the Git icon on the left hand side panel:

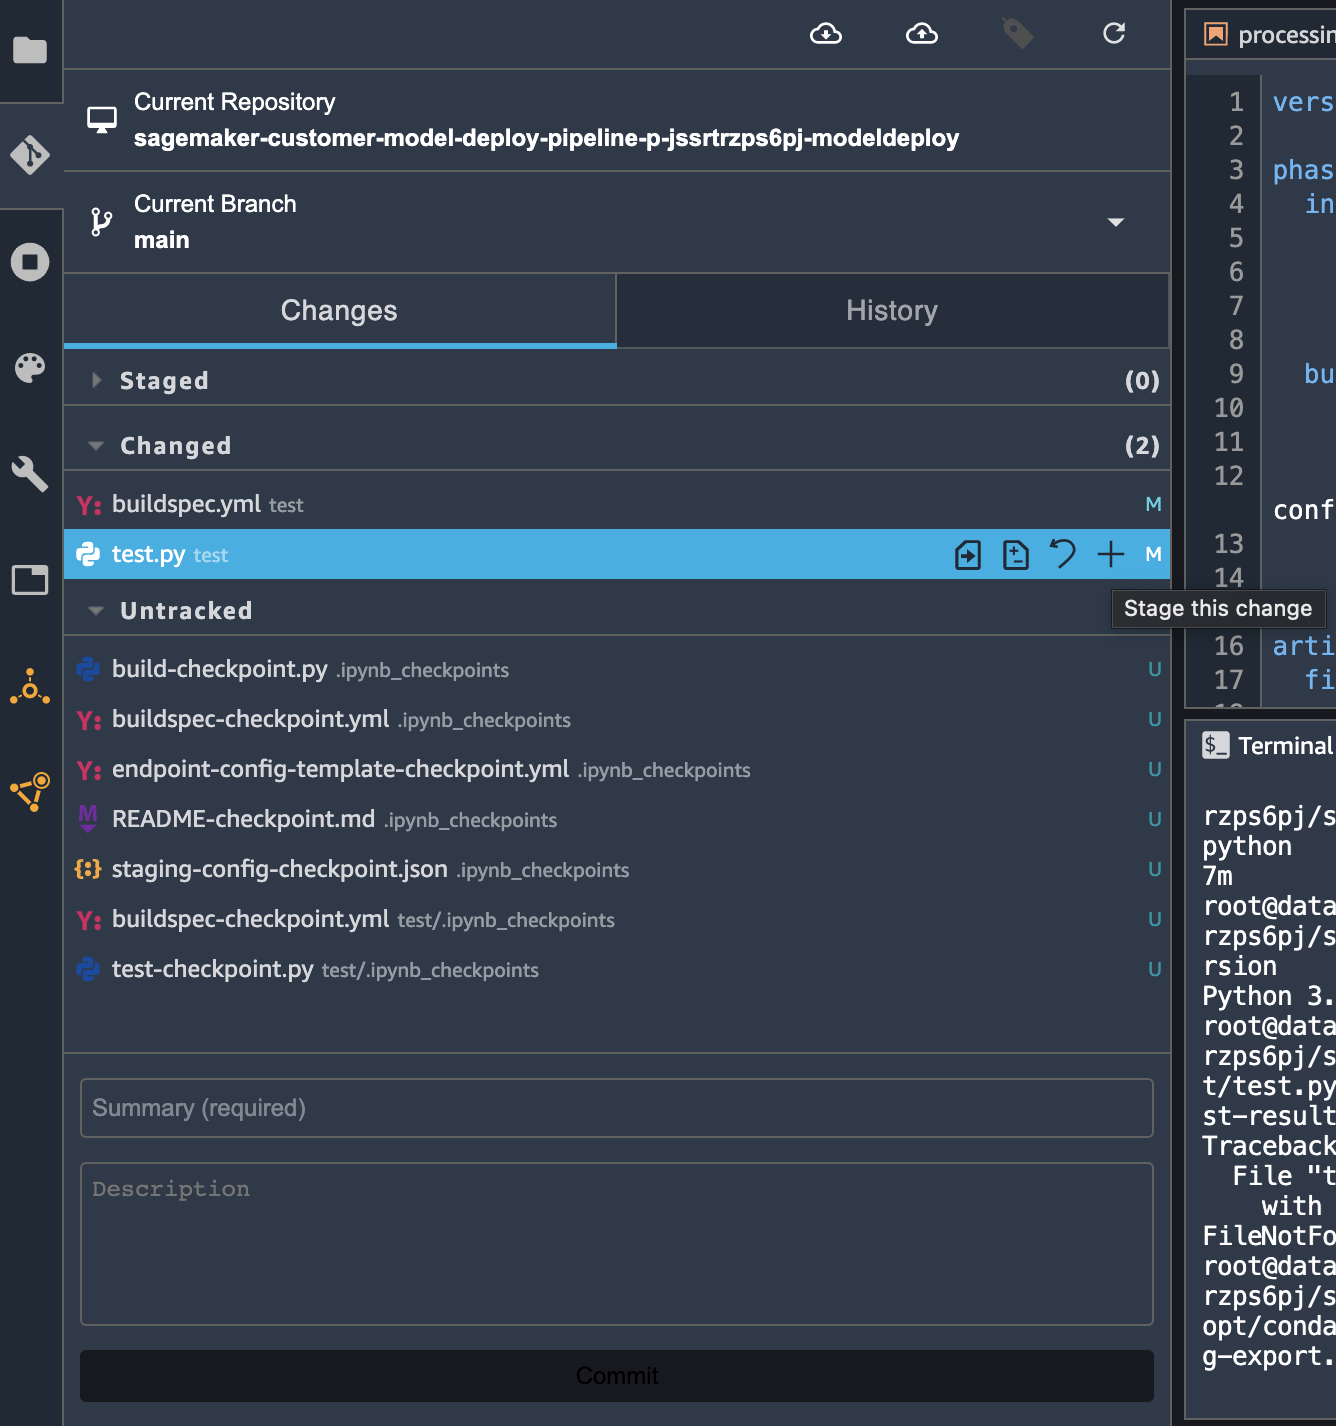
The git panel should open and you should see that the test.py and buildspec.yml files are now under the Changed section. Click the + (Stage this change) icon next to the two files to stage them:
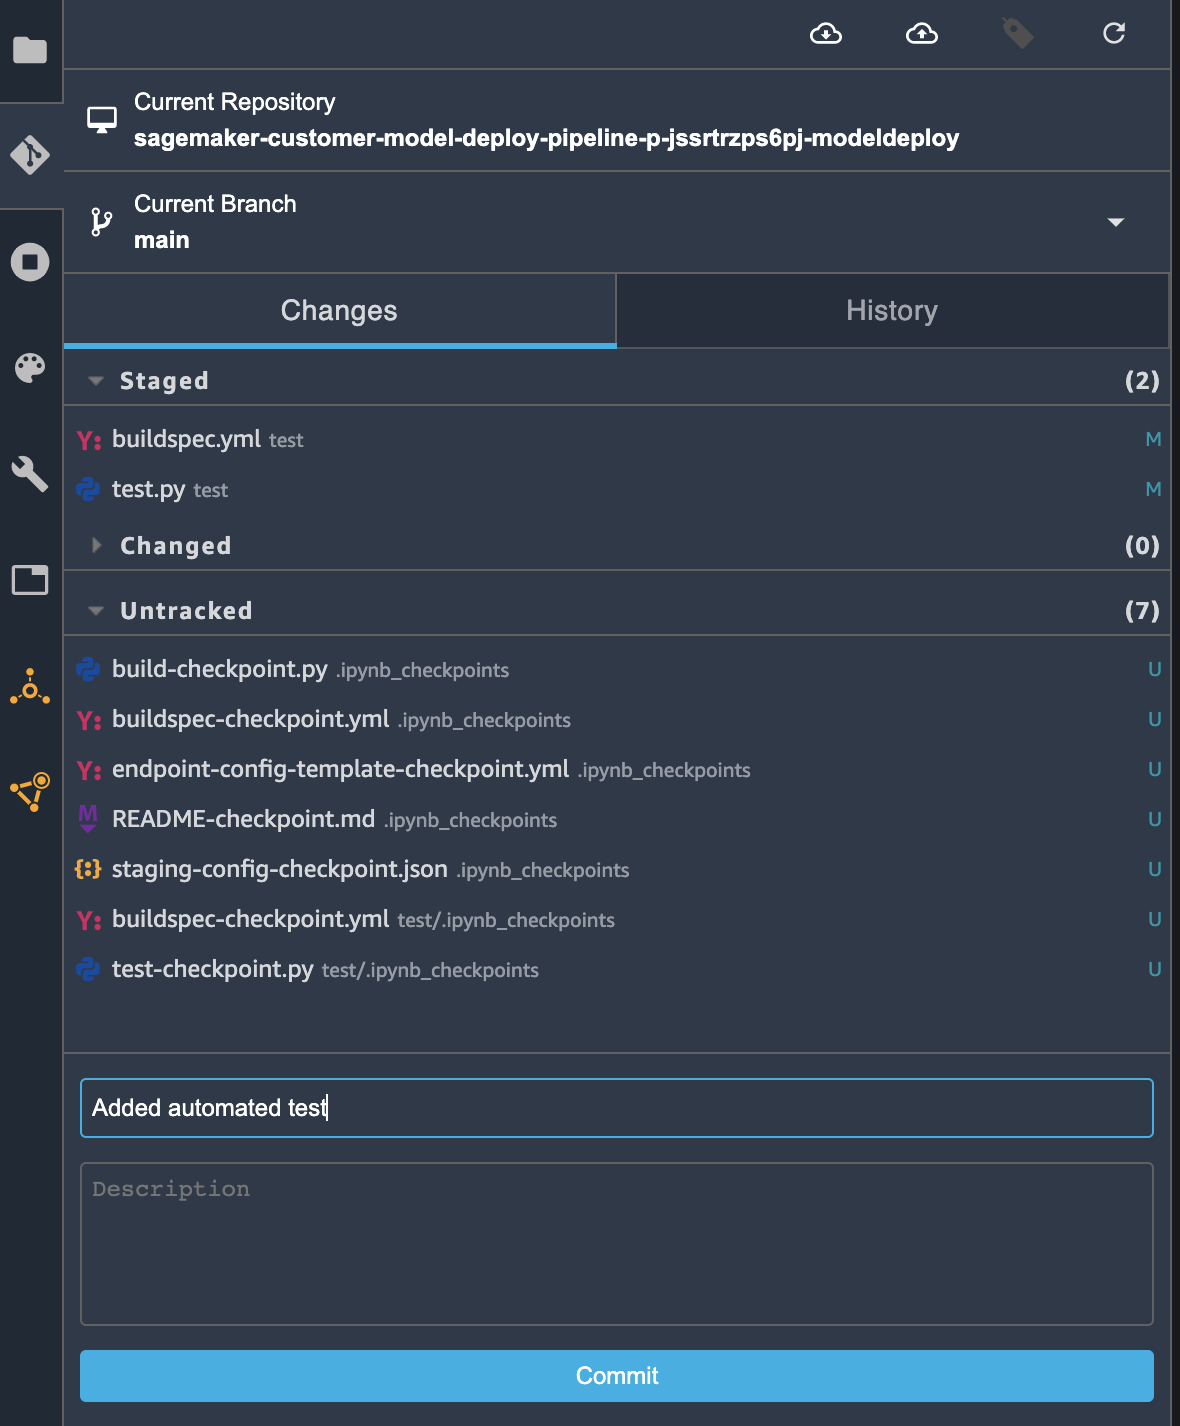
Once the two files moved to the Staged section, you can add a commit message “Added automated test” in the Summary (required) field. Then, click Commit to commit the changes:
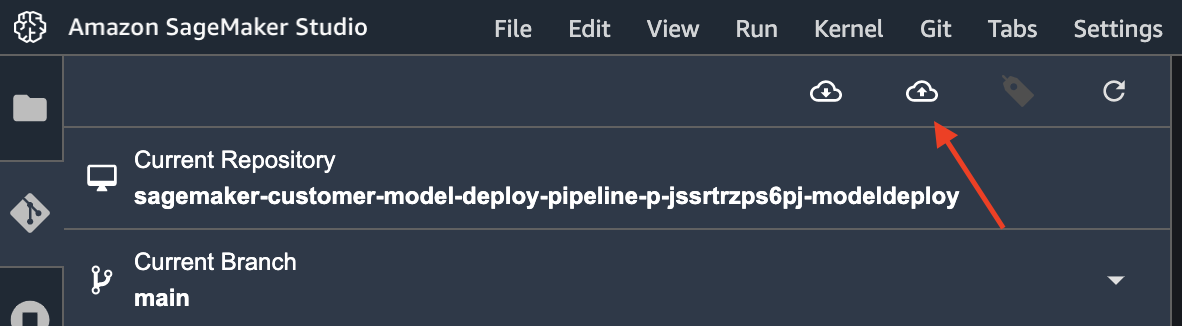
Then, click on the Git push icon on the top:
If it is your first time using Git push in this SageMaker Studio, you may be prompted to put your name and email so your names are associated with the changes made in the git repository.
It takes a few seconds to push the code to CodeCommit. You should see a popup when it’s finished.
Check the results in CodePipeline
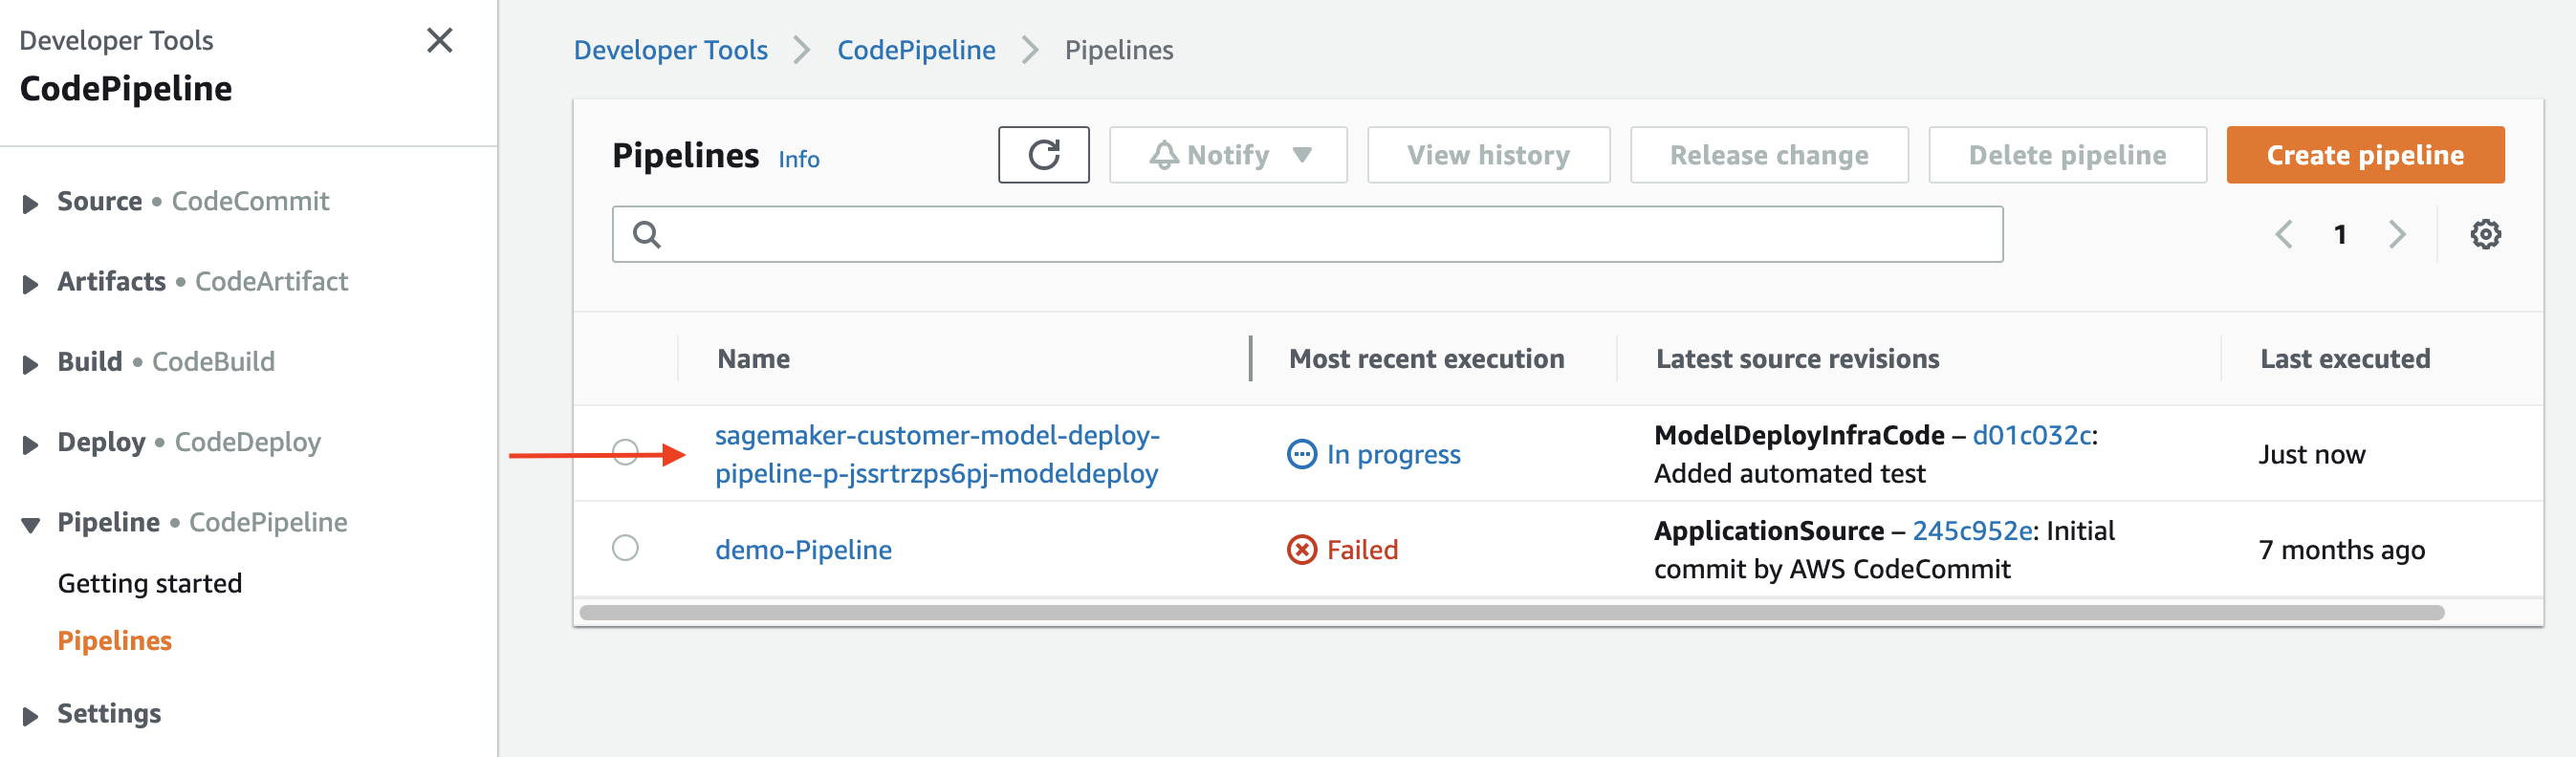
When CodeCommit receives the new code, it should trigger a CodePipeline deployment. Navigate to the CodePipeline console by searching for CodePipeline in the top search bar in AWS console. You should see the pipeline created in lab 2 with a name sagemaker-customer-model-deploy-pipeline-*:
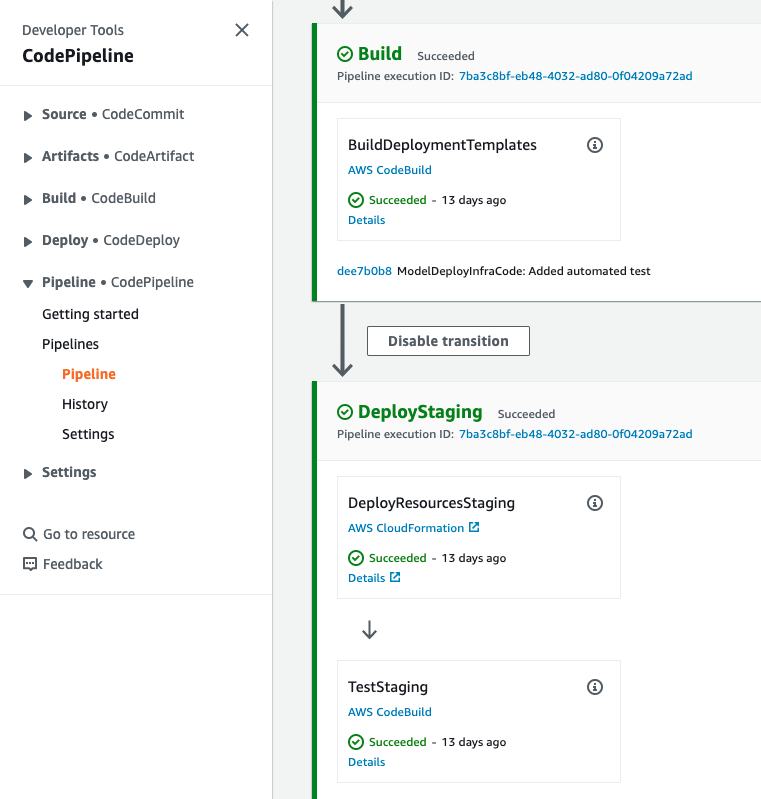
Click on the pipeline name to go to the pipeline details page. It may take a few minutes to run the Build and DeployStaging stages. Wait until the TestStaging action changed from In progress to Succeeded, then click on the Details link.
In the action details page, you can see the logs under the Build logs tab.
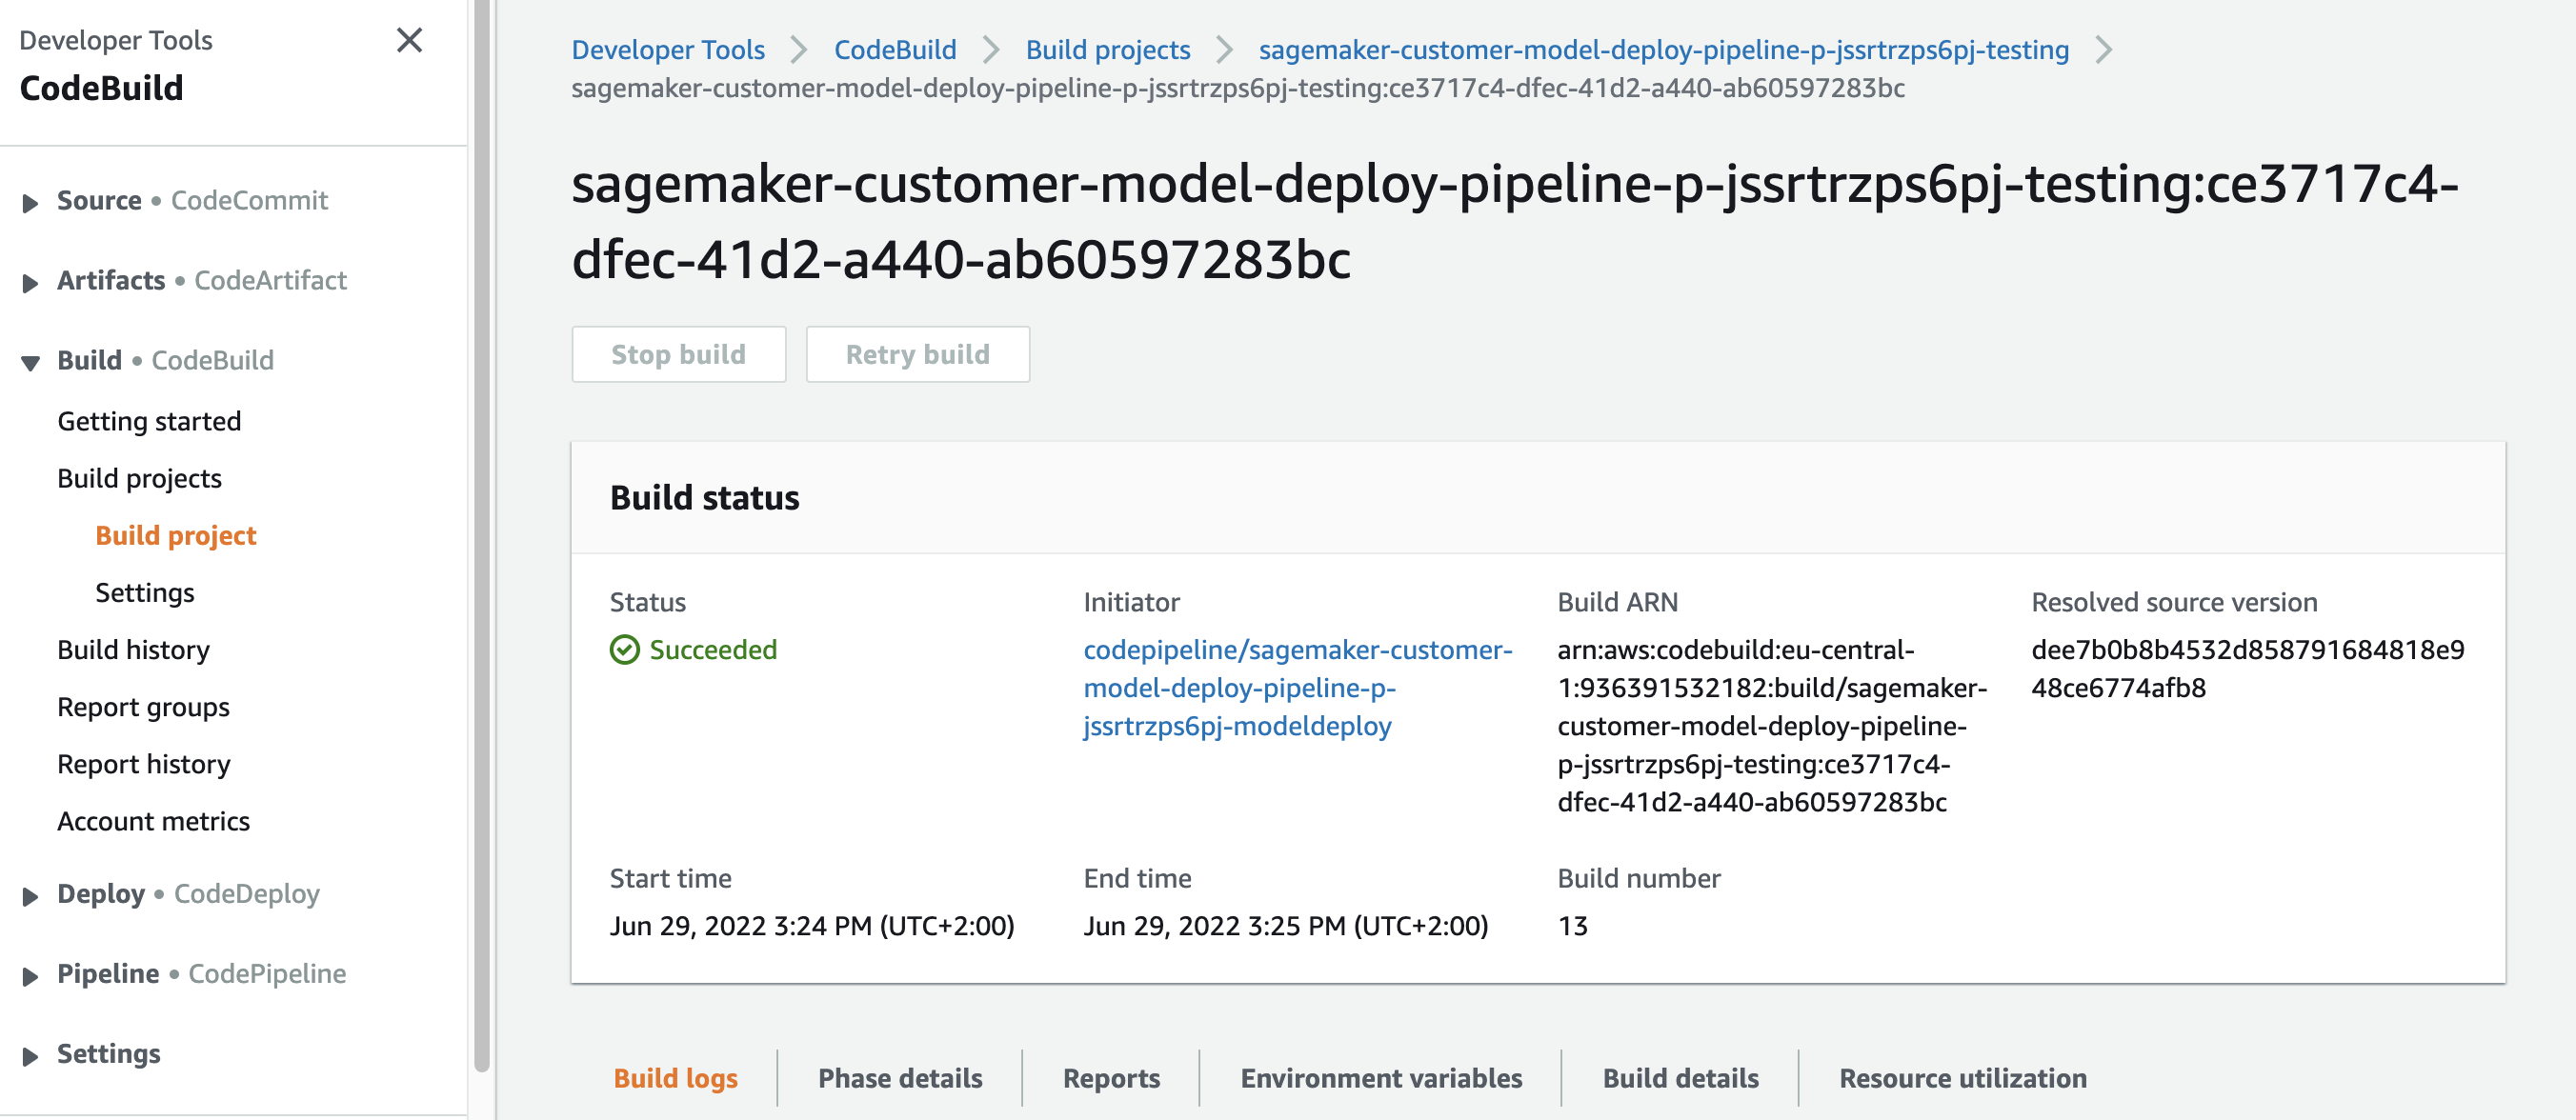
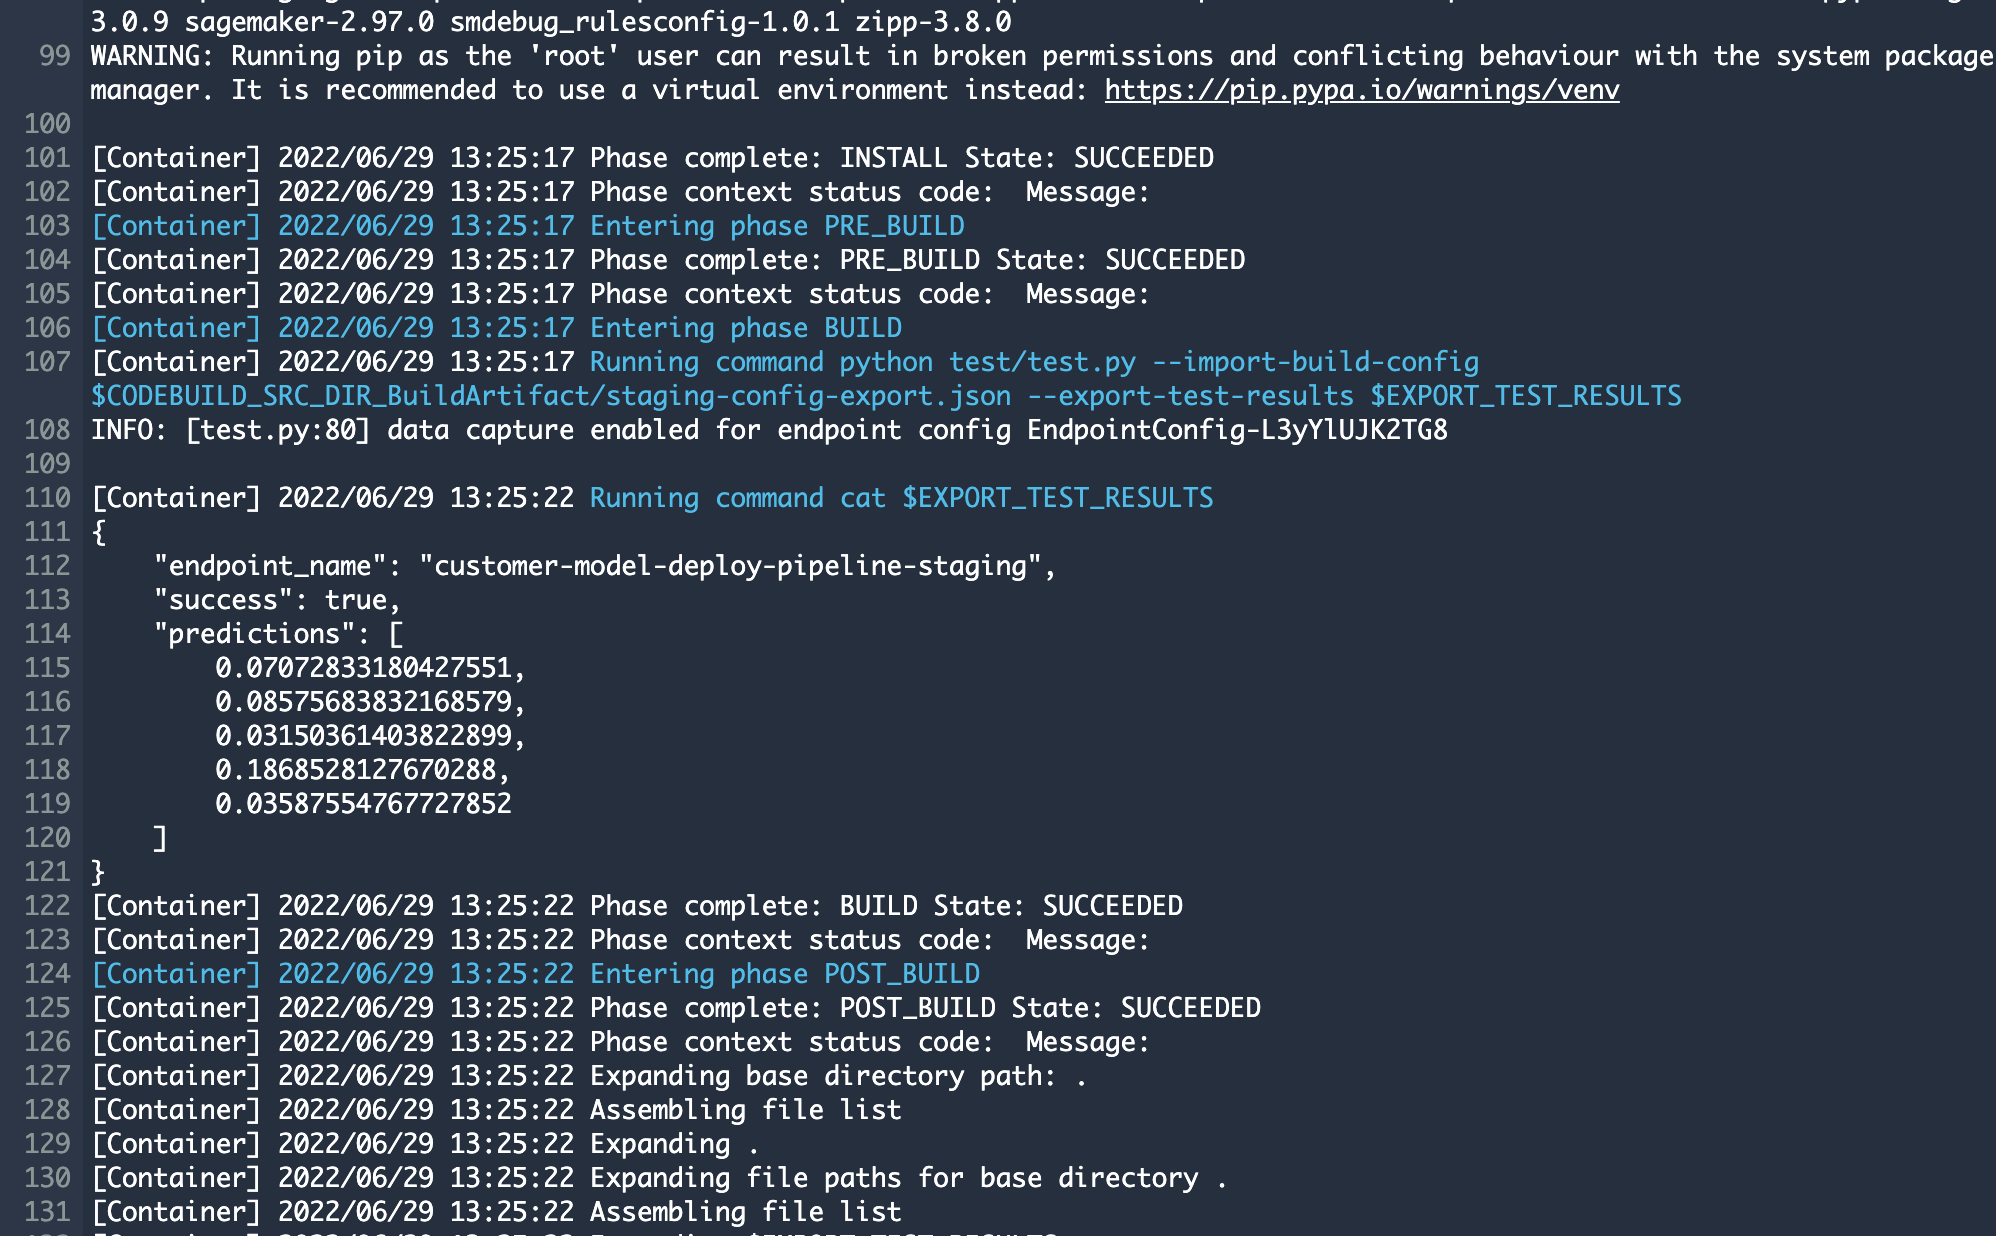
You can see that the test runs the python test/test.py script and outputs the predictions.
In case you accidentally breaks the model and the model is not performing inference correctly, this test action will fail and prevent you from deploying a broken model to production. This kind of automated test is critical to your MLOps pipeline because it give you confidence to deploy and prevents human errors in manual testing.
Conclusion
Amazon SageMaker provides a powerful tool for MLOps through SageMaker Projects and the MLOps Project Template. As we saw in this post, with just a few clicks you can set up an automated continuous deployment pipeline powered by CodePipeline, CodeBuild, and other AWS services.
The key highlights include:
- The template creates all the pipeline infrastructure needed: CodeCommit repo, EventBridge rules, CodePipeline, etc.
- The pipeline detects new models registered and approved in the Model Registry and automatically deploys them.
- Configuration like endpoints are defined in code for repeatability.
- An automated test step allows you to validate the staged model before production deployment.
By managing both the ML application code and the MLOps scaffolding code in Git, you gain full visibility into changes over time. This best practice enables collaboration between data scientists and ops engineers to build a robust MLOps foundation.
Going forward, you can extend the template by adding data quality checks, model monitoring, and integrating the endpoints with applications. With this automated foundation in place, your team will be able to experiment and update ML models rapidly while maintaining high quality.